2.5. Create contact, Create appointment

1.5.1. General introduction
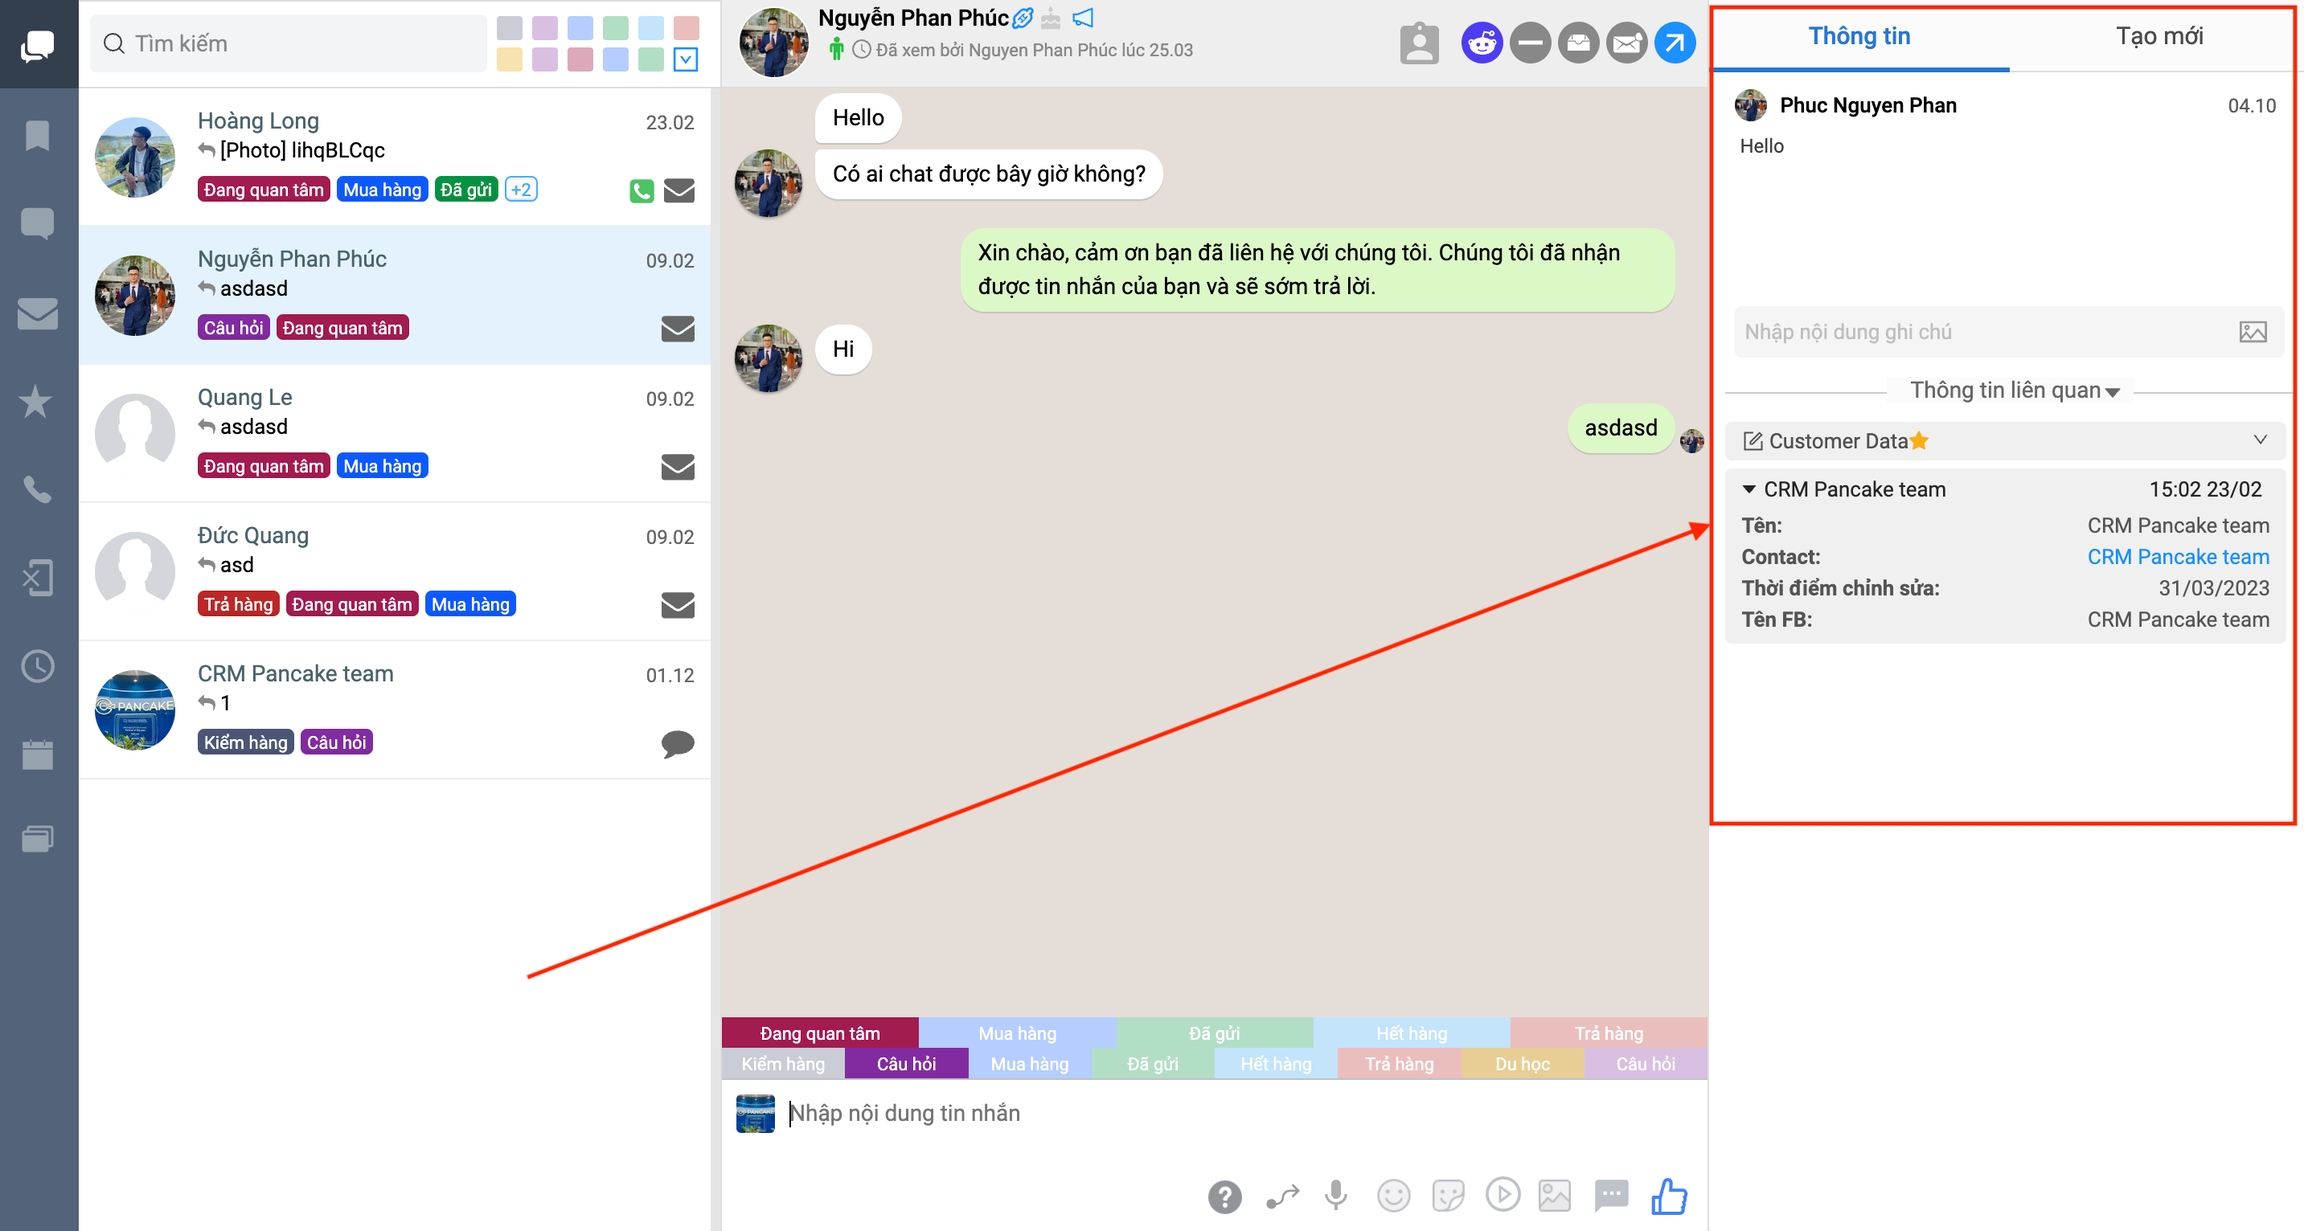
On the Pancake interface, the right side includes the following functions: Information and Create new
A. Information
The information section consists of two parts: the upper part is notes about the customer and the lower part is related information.
1.Note section: You can quickly note related information during the exchange with customers, you can add photos to the notes here

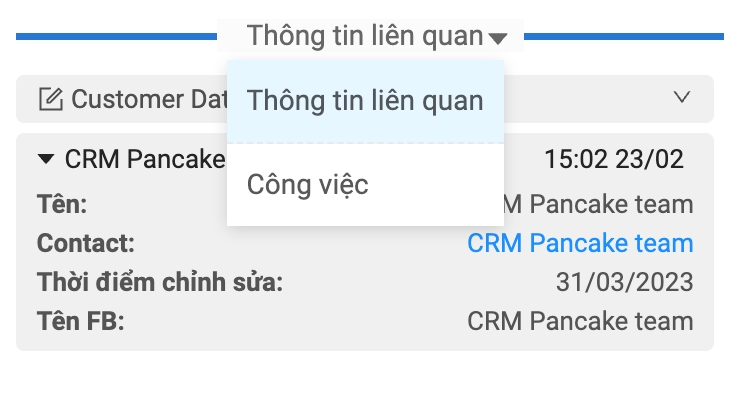
2.Related information section: View information from data tables installed on CRM, store information after "Create new" in section B

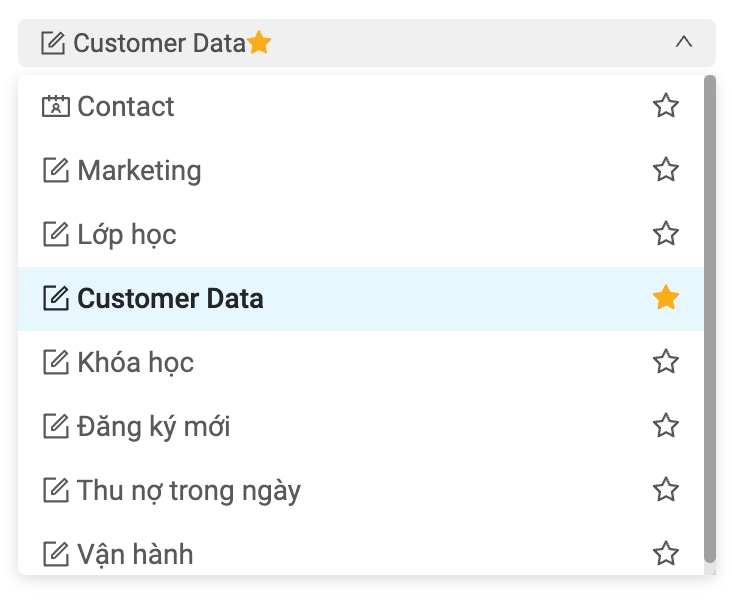
3.Data tab: You can choose to change the data tables to view, edit, delete, customer data related to the tables. Note: in this section we can choose so that a data table we want to prioritize to view, prioritize to display.

4.Edit information card: In data tables, we can store a lot of information and customer cards. To edit those cards, you need to move the mouse pointer to the card. Immediately, the upper right corner of the customer card will display task icons including: Edit history, create job and edit card information.
B. Create new
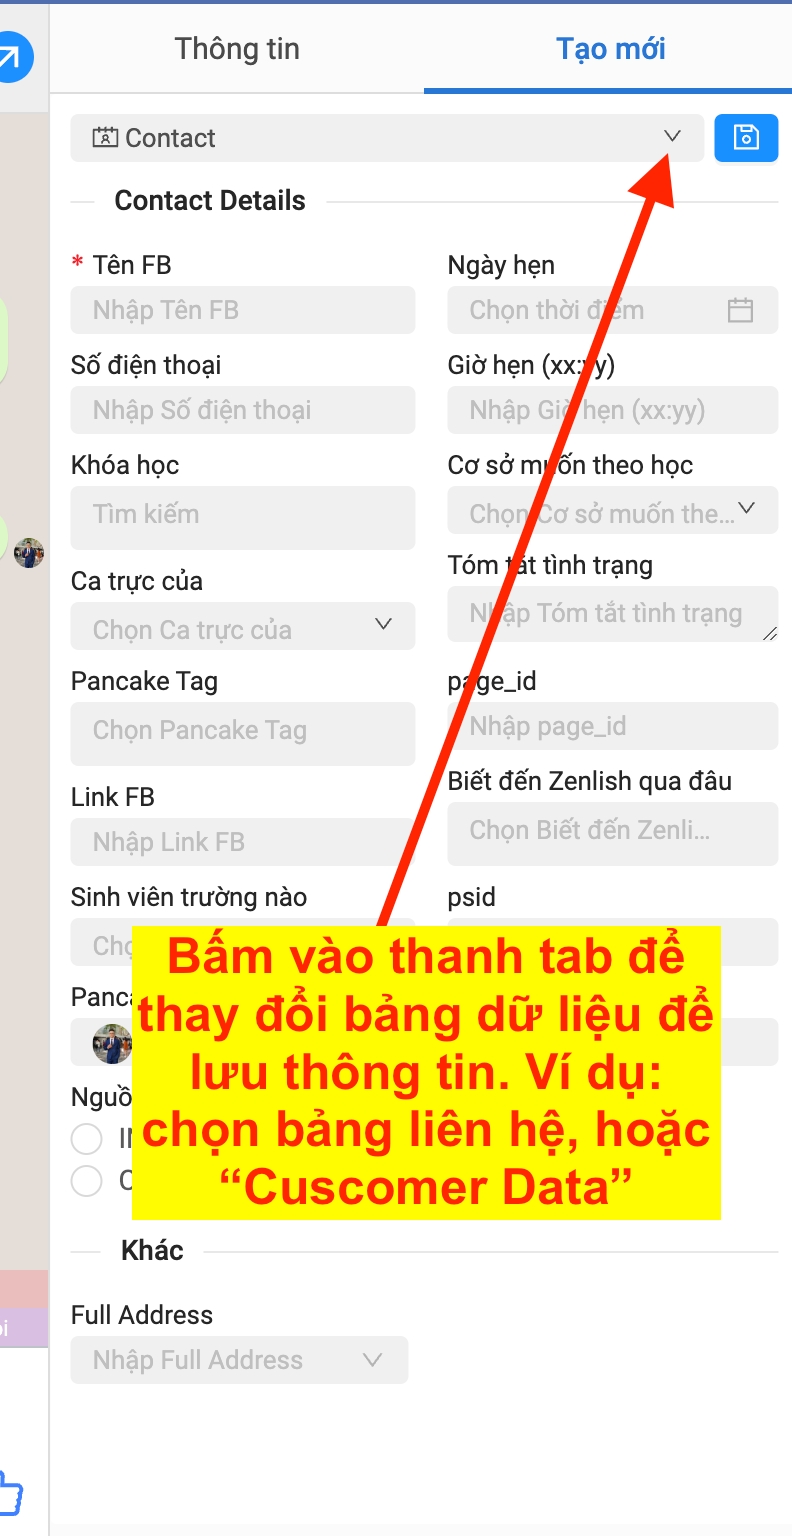
Step 1: To create new and store customer information, right on the Pancake interface, select "Create new". Immediately after that, the interface displays the information that can be entered in the data table.

Step 2: Select the data table to save information. To choose the data table that suits your purpose (Specifically, MKT will work with the contact table tab and the Customer Data table)
"Contact" tab or "Contact": During the process of taking care of students, you will need to save student information before the student agrees to schedule an appointment with you. For example: Phone number, Who's shift, notes, Pancake Tag, ...
"Customer Data" tab: When the student agrees to receive consultation and selects a time, you switch from the "Contact" tab to "Customer Data" and fill in the information completely, similar to filling out the form when the student agrees to receive consultation. You will only need to work right on the Pancake interface.

Step 3: Save information
After selecting the data table and filling in the necessary information, you need to click save, the save button is on the right side of the tab in the "Create new" section on the top right.
Last updated